Stained Glass Tools + Supplies we use and love
Strap in because this is gonna be a long one. Below is a comprehensive list of all the tools and supplies we use on a regular basis. If you’re just starting out in stained glass, this might seem overwhelming, but please be aware that not all of these are necessities! I’ll make a note of which are nice to have but not necessary. Also please note, there are a lot of supplies that we use and I probably forgot some, so I might edit and add onto this list in the future.
This blog is broken down into the following sections:
glass cutting and grinding copper foiling and leading soldering safety finishing
Feel free to click the above links to go directly to whatever section you want to explore!
Glass Cutting and Grinding TOOLS + Supplies
Glass Cutters
After using a standard Fletcher glass cutter for 40 years, I had my mom try a Toyo pistol grip cutter and that’s now her go to.
That was also my go to up until last year when I decided to treat myself to a Silberschnitt 4000 glass cutter with a transverse handle. I’m really happy with this cutter. Not only does it score the glass really nicely, but since I’ve been experience more chronic pain in my hands I find this style even more comfortable than the pistol grip.
nice to have but not a necessity
We find that sometimes on some extra hard glass our regular cutter just don’t cut it and we’ll switch to our Red Devil glass cutter, which has a steel wheel instead of a carbide wheel. I personally hate this style of cutter—it really hurts my hands to use—but sometimes its necessary.

Cutting Oil
We don’t care about which brand of cutting oil we use as long as it’s specifically made for stained glass cutters we’re happy with it. Even though our cutters are made to have the oil put in them, we find it makes too much of a mess doing it that way. So we use either a small glass or jar with a folded up paper towel soaked in oil on the bottom. That way we can roll our cutting wheel on there every few cuts to help lubricate the wheel and remove any glass chips.

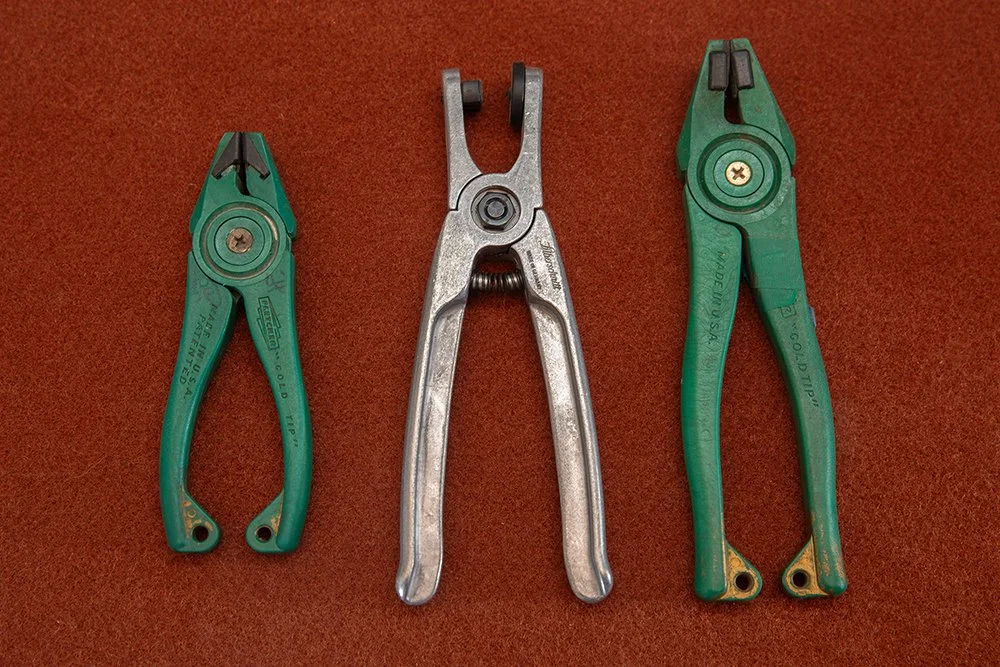
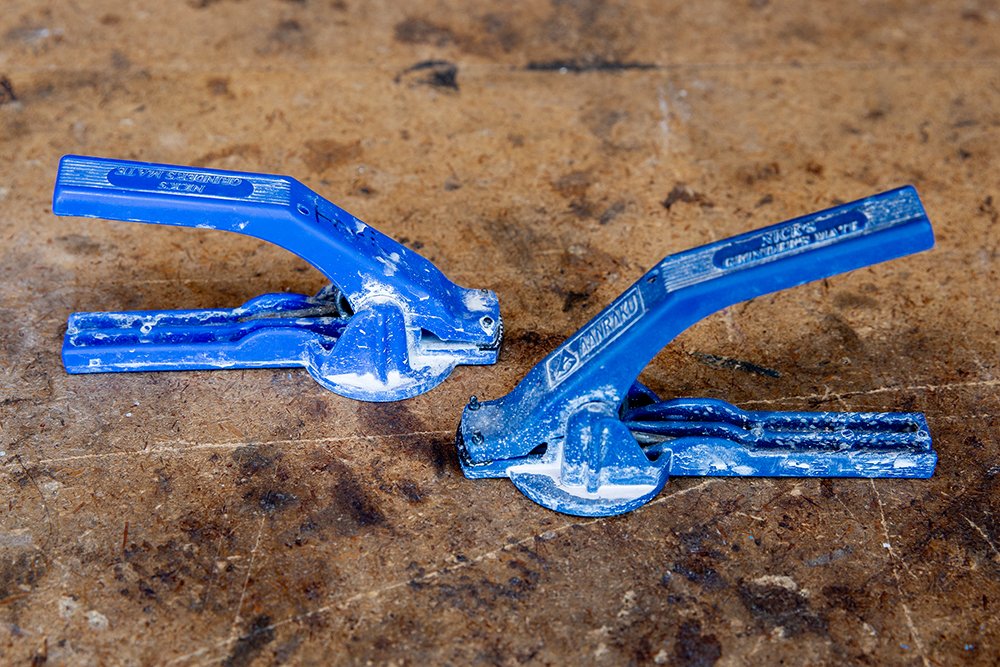
Grozing Pliers
We aren’t tied to a particular brand for our grozers either, but we do prefer them to have a spring and the rubbery handle. We use the standard 3/8” jaw the majority of the time, but do each have a pair of narrow 1/8” jaw pliers for our more intricate cuts.

Crescent wrench
nice to have but not a necessity
When a piece is too small to break holding the glass in our fingers or when we want to ensure a sharp point is going to break correctly, we’ll use an adjustable crescent wrench to hold our piece of glass instead of with our fingers.
We’re lucky enough to have multiple pairs of grozing pliers so sometimes we’ll use a second pair for this instead of the wrench, but I do like how small the jaw of the wrench is, so for extra small or pointy pieces I’ll still use the wrench.

Running Pliers
We both use Fletcher brand running pliers, my mom uses the 8” and I use the 6”—this wasn’t an intentional choice on my part, they were just an extra pair in the studio, but I do like how small they are. We have tried all sorts of running pliers and honestly they all seem to work the same in my opinion, but I do like how light weight and long lasting ours are.
I recently invested in a pair of Silberschnitt running pliers. I’m still getting used to them and find they work very similarly to my regular runners. But I do like how deep the jaw of the pliers are, which allows them to get further up on the score line.
Strip cutters + Circle cutters
nice to have but not a necessity
We love our Glastar strip cutter. These also come with an attachment to use as a circle cutter, but we don’t use them that way. We use our strip cutter with our home made cutting boards, which you can learn how to make here.
Our Silberschnitt circle cutter is great for making all sizes of circles. We use this circle cutter over our Glastar version because we like that this one suctions onto the glass so that you don’t have to hold it in place and can focus on scoring the circle. The only downside is you need a good amount of clear space around you to use it since the arm is so long.
Since my mom makes a bunch of things with the same size small circles, she invested in a lens cutter and it’s saved her so much time.

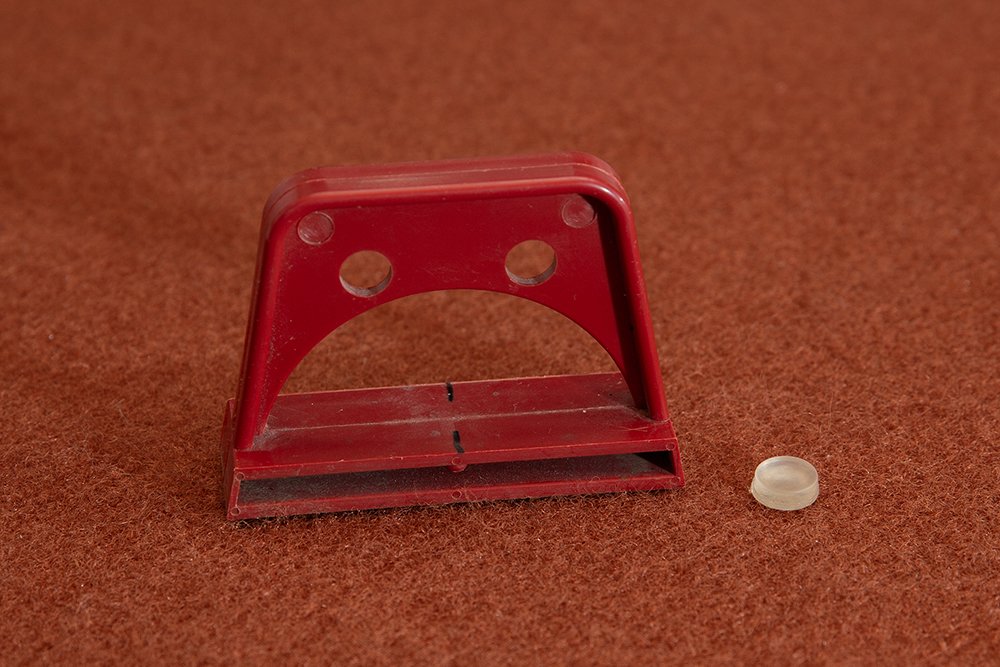
morton safety break system
nice to have but not a necessity
We found half of this tool in our studio a few years back, jerry rigged it with a little rubber bumper we had laying around, and were shocked at how cool of a tool it is. You can see my mom’s reaction the first time she used it here. We honestly don’t use this very often, but it’s pretty cool when we do.
Cutting squares
nice to have but not a necessity
These are handy when you want to cut down large sheets or when you just need one straight cut. I tend to use these more than my mom does for cutting purposes.

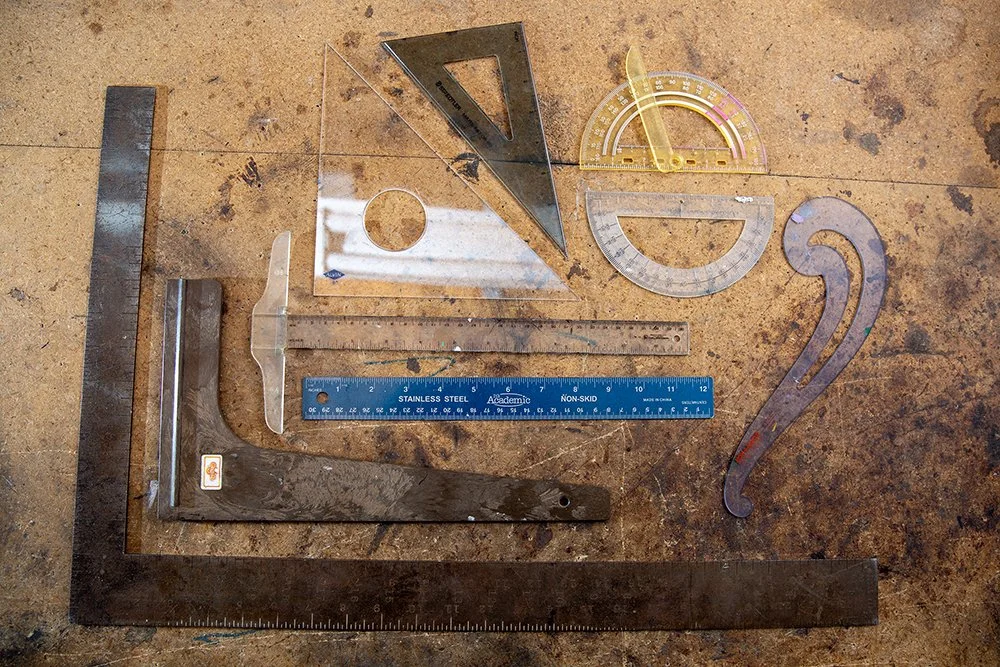
Drafting tools
nice to have but not a necessity
These drafting tools are nice to have for a variety of reasons. My mom uses them all regularly since she drafts hers patterns by hand. I don’t use them that often, but they are very handy when I need a straight line or particular angle drawn onto my glass.
We use the big metal right angle all the time when setting up our layout boards to ensure our edging are set up completely square.
Markers
After finding out my mom’s lead levels were slightly elevated and realizing that she had a bad habit of opening her sharpies with her mouth (if I’m being honest I’ve caught myself doing it too) I bought us clickable sharpies. They are a total game changer! As our class sharpies die out they will also be replaced by these. We prefer the extra fine tips.
For darker glass we use the metallic sharpies—I wish these came in the extra fine tip and/or just retractable.
When we really want our marks to stay put we use the decocolor extra fine tip paint marker. When we really really want our marks to say, we let the paint pen dry a couple minutes and then cover it in a small amount of chapstick—this is especially helpful when we’re using our ringsaw.

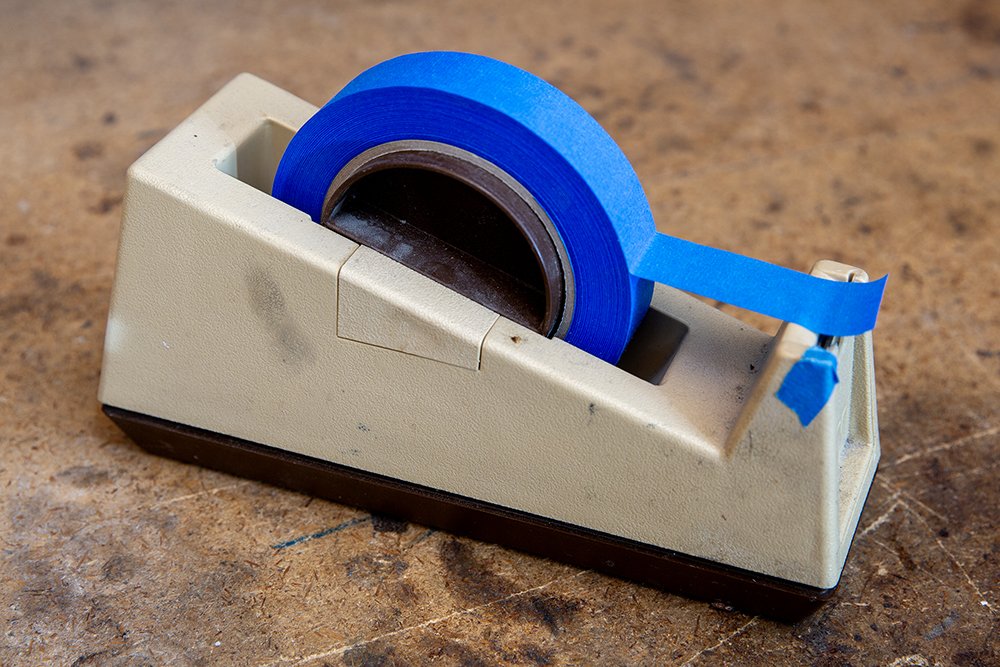
tape
We love blue painter’s tape and use it for almost everything!
Grinders + Grinder bits
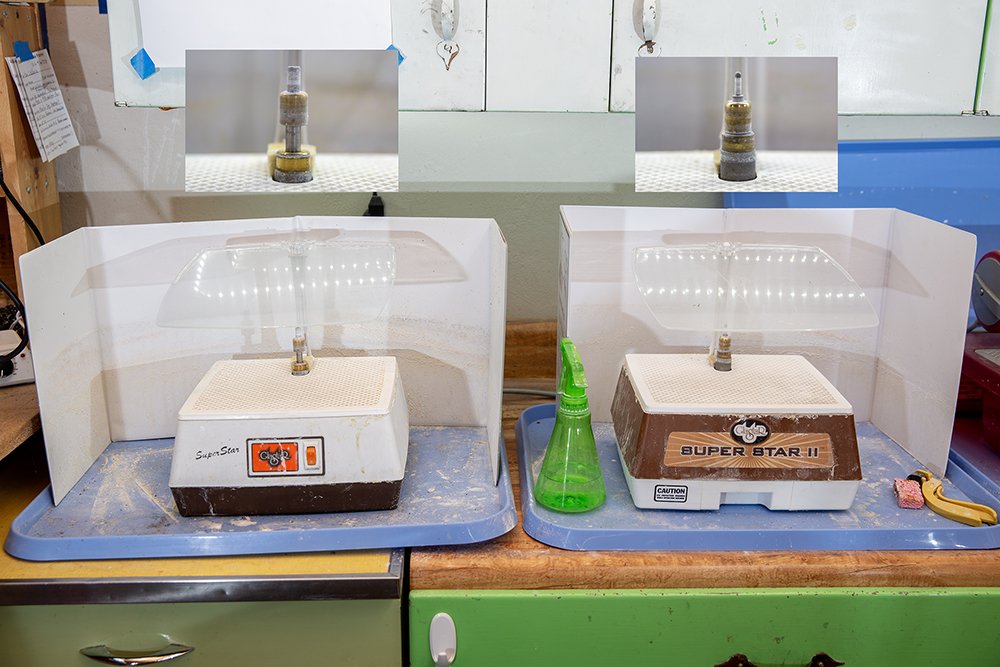
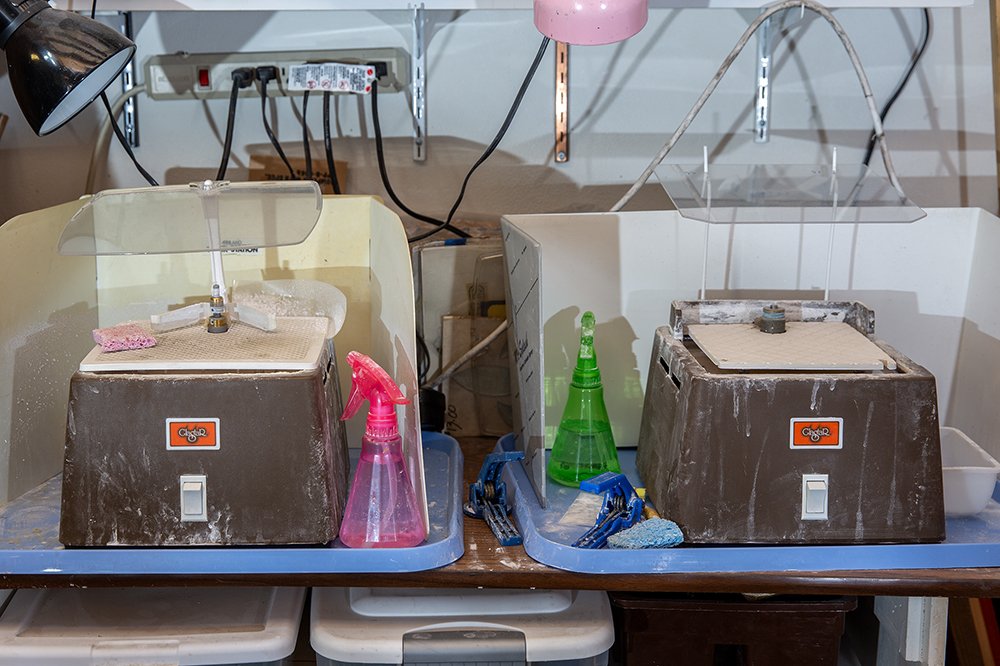
We absolutely love all of our Glastar grinders—my mom has two of the old school models and I have two of the all-star models (we’re very very lucky). These are workhorse machines if you take care of them. My mom has had hers for 30 or 40 years (they’re the first and only ones she’s bought).
We like to keep our grinders on large plastic trays (ours are hospital lunch trays) and we have the foldable grinder screens behind them. This help keep the mess to a minimum and makes for easy cleanup.
One of our grinders has a standard grit bit that we use when we have a fair amount to grind off and the other has a fine grit that we use for all other grinding and finish up. We stocked up on our fav Glastar bits as soon as they went out of business, but have been trying all the other brands to find one that’s comparable for when we inevitably run out. After years of searching we think we finally found one! So far we like the Techniglass Brilliant Bit the best—we’ve only tested the fine grit, but it was very similar to the Glastar brand so we’re hopeful the rest of the grits they offer will work just as well. We’ll be ordering a standard and rapid grit soon to test those out too.
nice to have but not a necessity
We also have a few Glastar jeweler bits. I believe ours are 1/4” and 1/8”. Both of which live on my two grinders all the time.
Grinder Mate
We not only use these for holding small pieces of glass while grinding, but we’ve found that they can be particularly helpful in avoiding scratches on clear glass, that tend to scratch easily, while grinding since it keeps the glass up off the surface of the grinder. We also will use them two hold two and grind two pieces of glass so we can get them to match exactly. You can see how we do that here.
ring saw
nice to have but not a necessity
Although we don’t use it very often, we absolutely love our Taurus 3 ring saw. We both tend to include very stupid and complex pieces in our design and this saw is so nice to have to aid us in cutting them successfully.

Marker remover
We use alcohol to remove any marker marks needed. Sometimes the metallic sharpies and paint pens can be tricky to get off so in those cases we use acetone.
We also like to give all our glass pieces a quick wipe down with alcohol to remove any glass dust or oils before foiling.

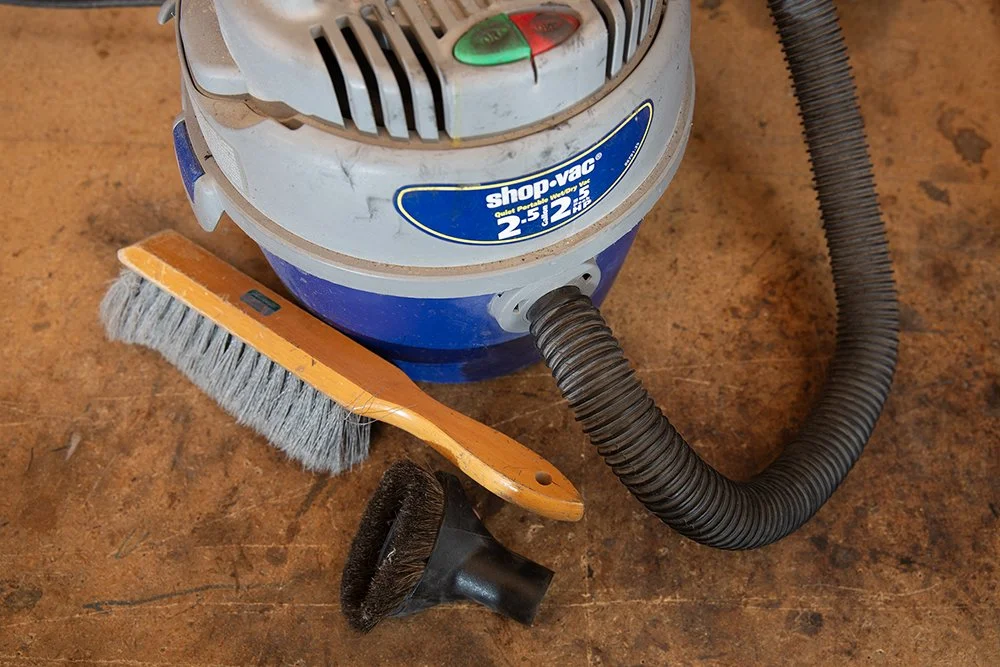
bench brush + shop vac
Keeping our work area clean is very important to us. We personally find the bench brushes sold at stained glass retailers tend to be the best.
Since we both cut our glass on indoor/outdoor carpet we find it easiest to use a vacuum to clean up our glass chips. I use a small shop vac and my mom uses an old vacuum.
Copper foiling and leading
Copper foil
We aren’t tied to any one brand when it comes to copper foil and use and sell whatever our wholesaler has available. We each keep a wide variety of sizes and color backing to best suit whatever project we’re working on. We’re both pretty frugal so whenever possible we’ll stick with copper backed foil because it’s the most affordable. If the backing shows through the glass or changes the appearance of the glass when backlit then we’ll switch to either silver backed or black backed depending on the project and if we’ll be adding patina.
nice to have but not a necessity
We love our little plastic organizers too since we have so many different sizes and backing colors.

thread cutters
nice to have but not a necessity
We prefer to cut our copper foil with thread cutters so we can quickly pick them up and put them down without dealing with getting our figures in and out of scissor handles.

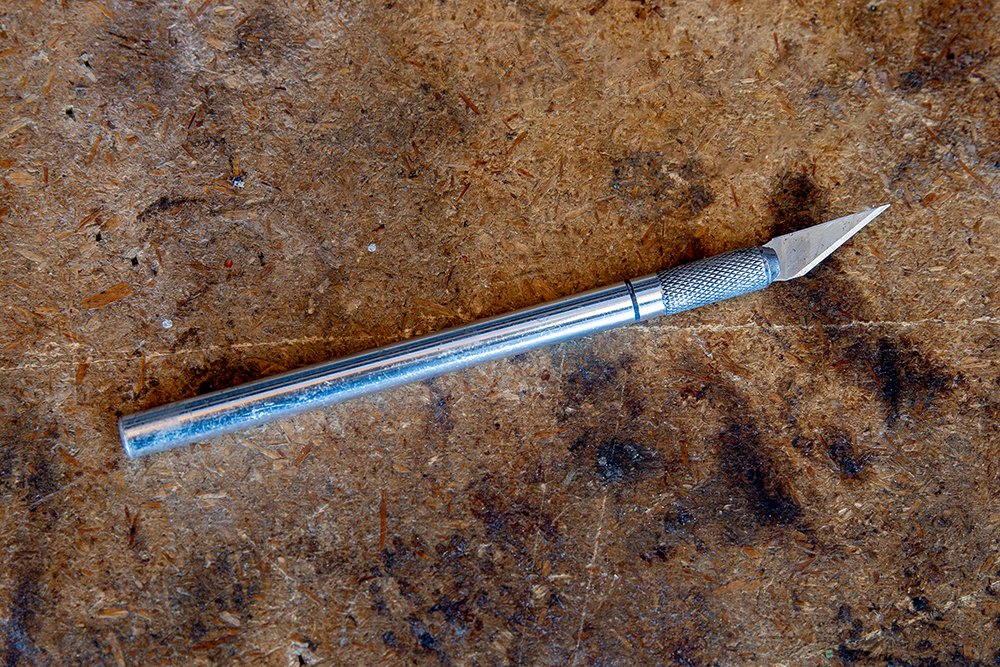
X-acto knife
We use our x-acto knifes for so many things, from trimming foil, removing from to carefully scrapping putty out of hard to reach areas.
fids + burnishers
I prefer the lathekin style fid to burnish my copper foil (currently foiling is really hurting my hands, especially when burnishing, so I’m on the hunt for a new fid or solution to help it hurt less. I’ll update space this once I find it.) We also use this style for opening up our lead came when needed.
My mom prefers to burnish her foil with an orange stick. We’ll also use these when cleaning up the putty on our leaded pieces.

lead dykes
We both use and love our Fan Out brand lead dykes.

Lead Vise
We like to use the simple lead vise mounted to our work bench to stretch our lead. We put one end of the came in the vise and hold the other end with a pair of grozing pilers and gently lean and slightly bounce backwards, making sure our feet securely planted on the floor.

Horseshoe nails
When it comes to securing our projects together we prefer using horseshoe nails and use little pieces of scrap lead to between the nails and the glass. We know they make stop blocks for this, but honestly we’re too cheap to buy something special when scraps of what we already have work perfectly well.

Molding and layout blocks
We have a large assortment of molding and layout blocks that help ensure our pieces stay square. We use random pieces of wood molding on our larges projects because it’s inexpensive and we can cut it to whatever size we need, but the metal blocks are really nice to have for small projects. We have a couple different kinds, some use metal tacks to hold them in place and some work with horseshoe nails. Because our project boards are usually plywood the tacks can be hard to use and will break off into our boards, so we did modify some of our metal blocks we use often to work with horseshoe nails to avoid that issue—we did this by cutting a slit on the sides with our Dremel.

Glazing hammer
Our hammers have a rubber end for tapping glass into place and a hard plastic end to tap our nails into place.

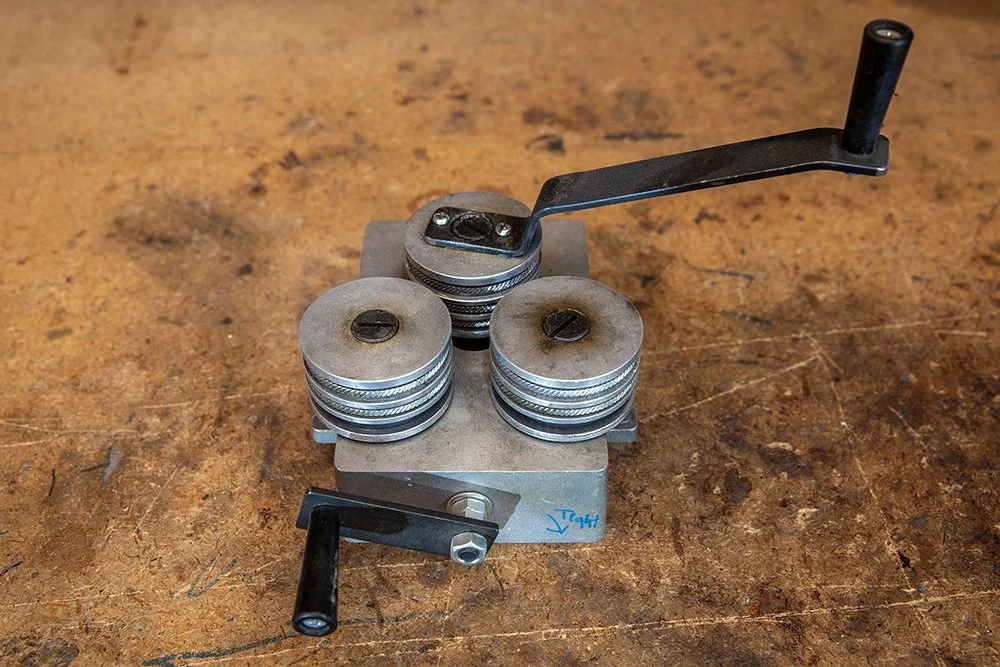
Came bender
nice to have but not a necessity
We are very lucky to have a friend who has mostly retired from doing stained glass and has loaned us her came bender and just lets it live in our studio. Although I noted this is not a necessary tool to have, it is if you are doing circular or oval pieces of any substantial size regularly. In order to bend zinc, brass or copper came to fit around a circular or oval window you need to have this tool. It works by slowly and gradually bending the came to avoid kinks.
Strong line
This copper coated steel reinforcement is fantastic and we use it for the majority of our internal reinforcing.

See our blog post All You Need to Know About Putty for a list of tools and supplies we use for that step of the leading process.
back to top
Soldering tools + supplies
Soldering Iron + rheostat
We both use a 100 watt Weller soldering iron. We use a 3/4” chiseled tip for the majority of our work, but I also have a 1/4” tip that’ll I use some times.
My mom uses a Glastar rheostat and I use a Mini Phaser, just because that’s what was lying around the studio when I started doing stained glass.

sal ammoniac Block
Tinning your iron is so important in our opinion. We tin our tips on the sal ammoniac before we start soldering, during the soldering session if needed, and before we turn our irons off for the day. This has ensured our iron tips last for years and years and that our solder continues to flow nicely as we work.

Flux
We have a few different kinds of fluxes we use regularly for different reasons. My mom’s favorite liquid flux is no longer made, but she does like the Novacan Old Masters Flux. She uses this when she wants an easy clean up.
My go to flux is the new Amerway tigers Eye Gel Flux.
We also use Nokorode Paste Flux when working with mirror or pressed flowers.
For our gel and liquid fluxes we like to pour just a little bit at a time into silicone cupcake liners. This way we keep our bottles uncontaminated and they’re super easy to wipe out to clean.
We also prefer using the regular ol’ metal flux brushes that any stained glass shop supplies. We do try to keep a brush for each different type of flux we use.

Solder
We aren’t too picky when it comes to solder and use whatever’s around. Generally we use 60/40, but honestly we aren’t averse to using 50/50 if we have it. Our wholesale supplier only offers Amerway so that’s what we use and sell.

safety
Safety Glasses
Safety glasses are so important to wear. I prefer to wear my contacts when I work in the studio so that I can wear my safety glasses that I find comfortable. I got a pair that are also blue blockers so I could wear them if I decide to do computer work in the studio.
My mom wears her regular glasses in the studio. Last year, for the first time in 45 years, she had a piece of glass break just right and had a glass chip fly right up under her glasses and into her eye. Luckily she was able to get it out with a pipet, but I decided to get her a pair of safety glasses that comfortably fit over her glasses so it doesn’t happen again.

RESPIRATOR + Filters
We absolutely love our 3M Rugged Comfort Quick Latch Half Facepiece respirators.
We make sure we get the fume rated filters (60923) for when we are soldering and the dust rated filters (2097) for when we are steel wooling lead came or puttying our pieces.
We each store our respirators and filters in an air tight container. This not only helps the filters to last longer, but keeps the spiders out of our masks.

soldering glove
We like to wear a gardening glove on our free hand while soldering to help protect it from the heat and stray hot solder. Ours are anything special, we just get them at Lowes, but I do like to make sure they fit snuggly so I can have as much dexterity as possible while working.

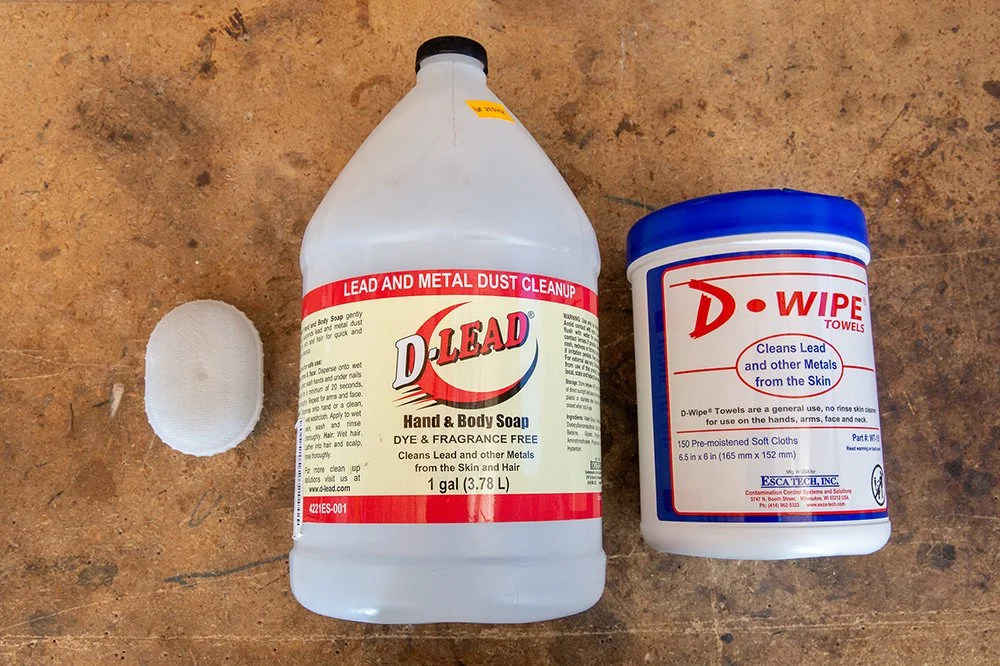
D-lead soap + wipes + floor mats
We try to take lead contamination seriously in our studio. We assume every surface of our studio is contaminated, because it honestly like is, so anything that gets set down in there and is going to leave with us—i.e. phones, water bottles etc—get wiped down with a d-lead wipe before we leave with it. I’ll also use the wipe to turn off the lights and open the door on my way out too because I’ve likely already washed my hands for the day.
Even if we haven’t worked with lead that day we always wash our hands with d-lead soap before eating, touching our face, or leaving for the day. For days when my hands are black from working with came I like to use the soap in conjunction with a gentle scrub brush to ensure I’m getting my hands extra clean, especially under my nails.
not a necessity, but nice if they work for your studio set up
I got the d-lead mats last year and in theory I love them, but for our current studio set up they don’t really work. They’re sticky mats that help collect lead particles and glass chips from your shoes, but because our studio is in a garage and we walk on it as soon as we come from outside it just gets covered in dirt too fast. These would be perfect if we had a break area that we ate in or if we worked out of a spare bedroom.
finishing products + supplies
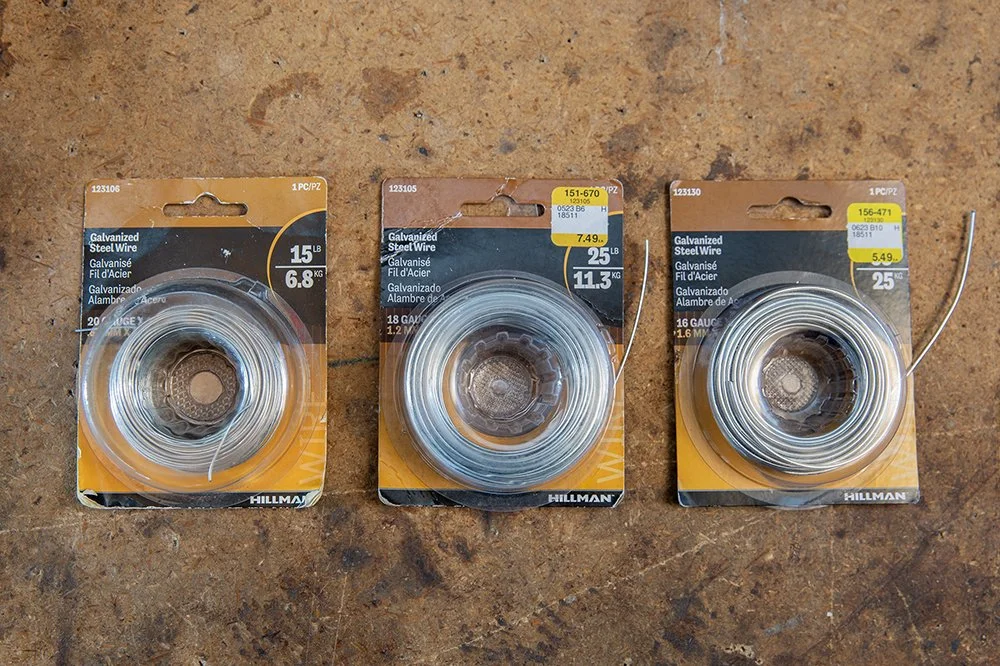
wire
We use galvanized steel wire in a variety of gauges depending on the projects need. We use this wire from every from internal bracing, making hangers and jump rings and attaching hooks to our pieces.
jewelry pliers
We use a few different pairs of jewelry pliers in our studio. We make our own jump-rings and hangers with them and use them to attach chain or for any wire work detailing.

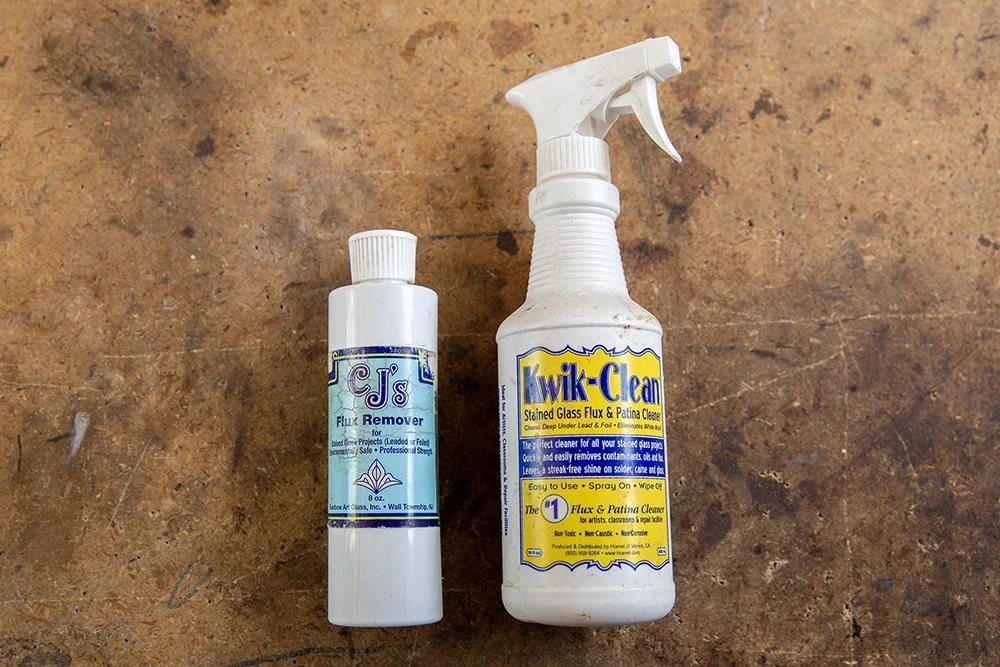
flux remover
Cj’s flux remover: we prefer this one to clean the majority of our pieces, especially when we’re washing them under water. We also like to use Cjs when we are going to copper patina a piece. It works wonders for a bright copper finish if you apply the patina while the solder lines are suds up with Cjs.
Kwik Clean: we save kwik clean for quick clean up jobs if we can’t finish soldering in one session. We also use it for our pressed flower pieces and kaleidoscopes when we want to be extra sure we’re exposing the piece to as little moisture as possible. In these instance we’ll spray it on a paper towel instead of directly onto the piece.
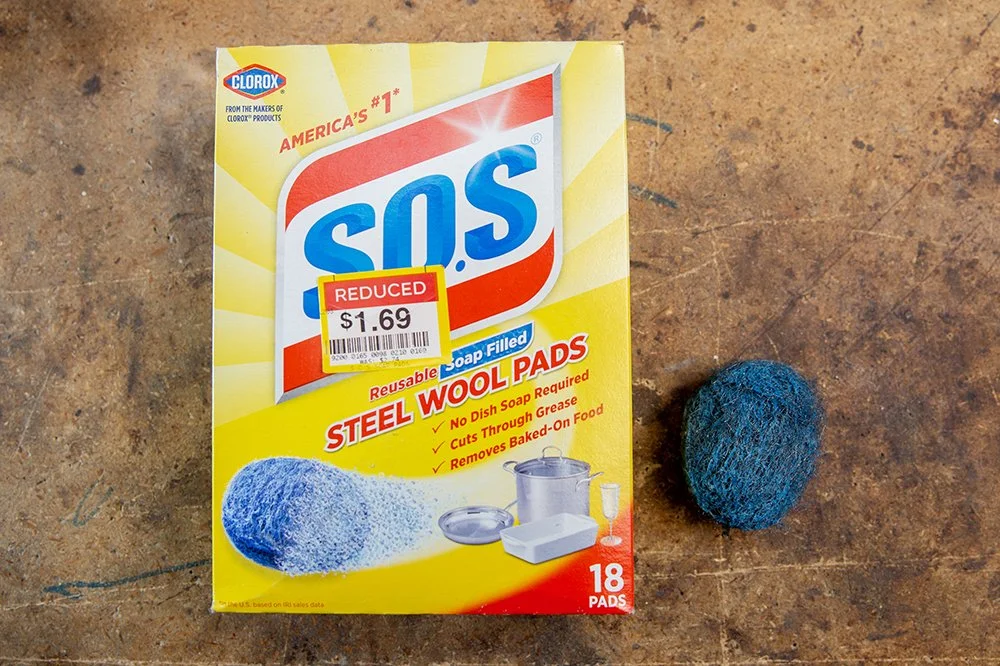
S.o.s Scrub pads
A few years ago we decided to switch from dry steel wooling our pieces with 0000 grit steel wool to using these pads while washing our pieces in the sink. This helps limit any potential lead particles from the air during the cleaning stage, plus they get our solder lines and lead came extra shiny.
Polish + Wax
We use a varity of polish and waxes. Our favorite for most things is semichrome, but I’ve had trouble finding it locally and any time I order it online in the past it was shown up exploded so for now I’ve given up on getting it. We switched to Mother’s brand Mag & Aluminum Polish and so far like how well it works.
I also like using Clarity Finishing Compound. For no reason in particular I keep this with our craft show set up. That way I can easily polish any pieces while we’re at a craft show.
We don’t always wax our pieces, since the polishes we use leave a wax like finish, but when we do we really like the Mother’s Brazilian Carnauba wax.
We use a tooth brush to apply our waxes and polishes. We like to use a paper towel to do our initial buffing because it more abrasive and removes more of the polish faster. Then we like to go in with a mircofiber cloth to really buff it up. I’ll use a clean tooth brush or an electric tooth brush to get any hard to remove polish up. And use an orange stick and my microfiber to really get along the solder lines and in all the hard to reach areas.

Whew, that was a lot and I’m sure I’ll find more to add in the future. We believe having the right tools makes a big difference in the outcome of our work. When we are properly equipped, we can work in safety, comfort, and confidence. Some of the items on this list can be found at our shop here. Until next time!