All you need to know about putty
When I initially sat down to write this I thought it was going to be easy and pretty straight forward. My mom has been doing lead came work for over 40 years and using the same recipe all that time. She learned the recipe from her very knowledgeable friend who used to own the local stained glass shop, so I figured we knew what we were doing. After I was almost finished writing, I did a quick google search just to confirm a few facts and ended up going down a multi day internet rabbit hole only to come out the other side realizing our recipe is maybe not the best, leading us to change it and leading me to rewrite this post. If it wasn’t obvious already, we are by no means putty experts, but after an extensive internet search, reading countless comments in stained glass facebook groups and reaching out to a few trusted friends in the industry, I feel like I have a better understanding of what putty is and what the ingredients do, and want to consolidate what I learned and share it with you. So let’s get into it.
What is putty + why do we do it
Puttying is maybe my least favorite step of the lead came process, but it is undoubtedly a necessary one. While you might be able to get away with skipping it on small leaded sun-catchers, you most definitely can’t skip it on a piece with any substantial size.
Puttying, also known as cementing—I say this, but know it is a heated topic, some people say the terms are interchangeable, while others strongly believe otherwise—is the act of pushing a soft oily compound between the glass and the came. This process not only waterproofs the piece, but adds strength and keeps the glass from rattling around in the came channel. The putty should be rigid enough to add stability to your piece while also retaining a bit of give and flexibility to account for the natural expansion and contraction that happens over time. You can buy pre-made stained glass putty or you can make your own. We prefer the latter because it saves us money and we can mix as little or as much as we need, plus we know exactly what’s in it—more on why this is important later.
ingredients + what they do
The key ingredients of putty are linseed oil (either raw, boiled or both), whiting, cement color/lamp black and sometimes a thinner like turpentine.
Linseed oil is a drying oil, which polymerizes overtime, giving the putty that rigid, but elastic makeup. Using either raw or boiled linseed oil will determine the amount of drying or set up time your putty needs. Raw linseed oil will add a lot more set up time to your putty, which is why a lot of recipes use a combination of both raw and boiled.
Whiting is just calcium carbonate and forms the bulk of the putty mixture. More or less whiting can be added to achieve your desired consistency. Below you’ll see we also use whiting during the clean up process. It is also a drying agent that will suck up any excess oils and help your piece set up faster. Whiting is slightly abrasive so it helps remove excess putty and polishes the glass and lead during the final cleaning process.
Cement color or lamp black is a colorant which helps darken the putty to blend into the lead lines and also darken the lead as you polish it up.
Thinners or volatile drying agents, like turpentine help thin the mixture and also help it set up quicker due to their fast evaporation times. Turpentine, mineral spirits and alcohol all have different drying times due to the different rates of evaporation—we’ve only ever used turpentine but I think from what I understand it’s the slowest to evaporate. It has been noted that you don’t want to use too large a portion of drying agent in your mixture as it could cause cracking and lead to a shortened life span of your putty. The goal is to have putty that will stay elastic for as long as possible and it’s my understanding that too much of a thinner could dry the putty out faster than a putty without it.
The type and amounts of each ingredient you use seem to be dependent on personal preference, the climate and region you’re in, plus how quickly you need your finished piece to set up. Please note the following recipe and how we use it is what we’ve found works for us through our research, experiments and how we work in our studio; think of this as only a jumping off point in your putty journey.
What not to do
After all this, you may be wondering why we changed our recipe and why it’s important to know all the ingredients in your putty. Our previous recipe was made up of the above ingredients, but it also contained Portland cement and Plaster of Paris, which in my research is apparently a big no no.
Portland cement and really any cement, is not only dangerous if inhaled, but also hardens too much. As we’ve discussed the goal of putty is to remain somewhat elastic; this extra hardness from the cement won’t give the glass the cushion it needs and could result in unwanted and extra breakage. In addition to that it makes it very hard to remove for repairs; which if you’ve ever done a repair you know how frustrating this step can be.
Plaster of Paris, and any other plasters, should be avoided because they absorb moisture which in time will breakdown the putty causing it to lose its waterproofness, which again is a key component of why we putty. We’ve also heard it could mold over time. I think this is especially important to take into account in high humidity environments and for windows that are exposed to the elements.
If these ingredients are so bad why are they included in so many recipes? I’ve been told that more commercial studios use them because they set up faster and are harder, therefore the windows are able to leave the studio faster and don’t need as much internal reinforcement because the putty has more strength to it from the cement. We’ve decided for us it’s best to think of the longevity of our pieces which is why we’ve now changed our putty recipe. I’ve read and been told that Vic Rothman’s putty recipe is the only one to use. Our new recipe isn’t his exact one (I’ve included it at the end of this post for reference so you don’t have to go searching the internet for it) but it is definitely based on it.
Since my mom was taught her initial recipe by her very knowledgeable friend, she never really stopped to question it and since she hasn’t had a problem with any of her past leaded work she never had a reason to. This all just goes to show that even after 40+ years doing something there is always more to learn and room to grow and questioning why and how we do something is an important part of that process.
How to Make It:
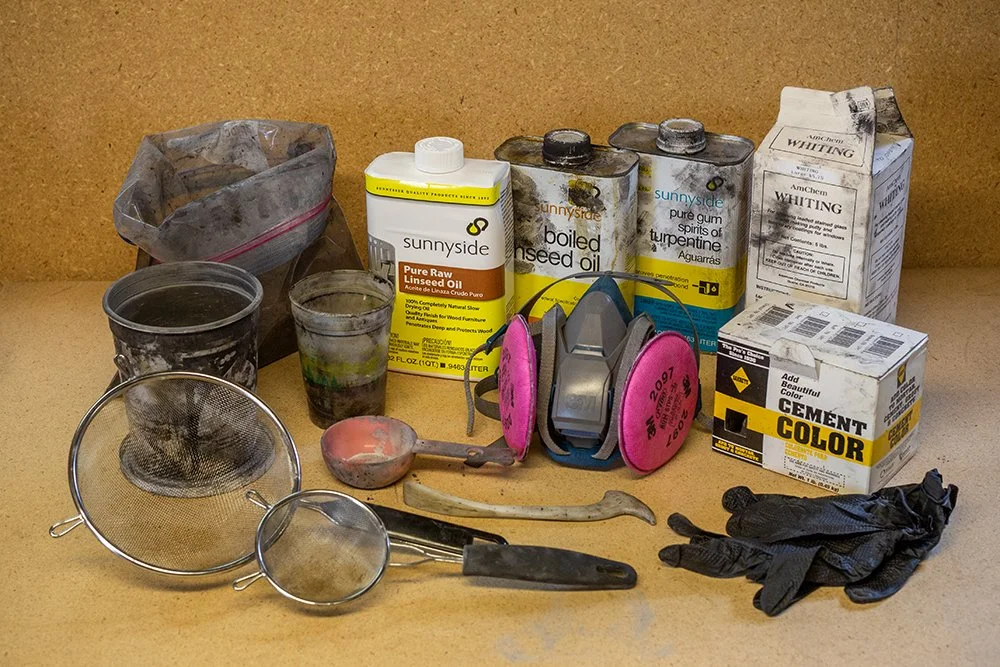
Things you’ll need:
bag or container for mixing dry ingredients
cup for mixing wet ingredients
container for mixing (+maybe storing) putty
measuring scoop
sifter - we like using two different meshes but this isn’t totally necessary
something to mix with - we use a fid
respirator with dust filters or at least a good dust mask
gloves
Ingredients:
4 parts whiting
cement color or lamp black to liking
1.5 part liquid
50% boiled linseed oil
50% raw linseed oil
optional: 1/4 part turpentine
Put on your PPE! The dry ingredients can create a good amount of dust that you don’t want to breathe in, and you definitely don’t want to get turpentine on your hands.
Sift dry ingredients into the bag/container and mix together—this isn’t like baking so you don’t have to worry about being super exact with your measurements.
Mix wet ingredients together in the cup.
Sift mixed dry ingredients again through the finer mesh sifter into the putty mixing container - sifting the powdered ingredients removes any clumps which leads to easier mixing.
Combine wet and dry ingredients. Spend a lot of time mixing this together and making sure there are no lumps and bumps as they could possibly scratch the glass later on. It will start out very dry and you’ll think it needs more liquid, but just keep mixing. The oils will start to mix into the whiting, but it takes time. We like our putty to be the consistency of smooth refrigerated peanut butter. You can add more or less of the dry and liquid ingredients to get your desired consistency.
That’s it! Your putty is now ready to use. We like to use our putty as soon as it’s made and try to only make as much as needed for the job at hand. But we have found that if you cover the left-over putty with water and store it in an airtight container, it can be used after at least a few days to a week later (we haven’t tested it for longer)—if doing this, just pour off all or as much of the water as possible and remix, again making sure there are zero lumps and dry spots.
How to use it:

I think every artist has their own way of doing this part, this is what works for us. Be aware this process is very messy and can create at lot of dust!
Things you’ll need:
respirator with dust filters or at least a good dust mask
gloves
small putty brush
orange stick/putty stick
putty
whiting
not always necessary but can be helpful:
painters tape
laminate or cardstock
turpentine or mineral spirts for clean up
If our glass has any amount of texture/cracks or pits (especially seedy or french crackle) or is sandblasted/painted we like to tape off and cover the larger portions of the glass with our recycled laminate and painters tape to try to minimize the clean up. This step is optional, but it definitely makes a huge difference and saves a good amount of time. The oils in the putty can possibly damage painted and sandblasted surfaces so it’s best to always tape off those areas.
Put on your PPE! Safety is important and for the same reasons as when mixing up the putty you’ll want to wear the respirator and gloves again.
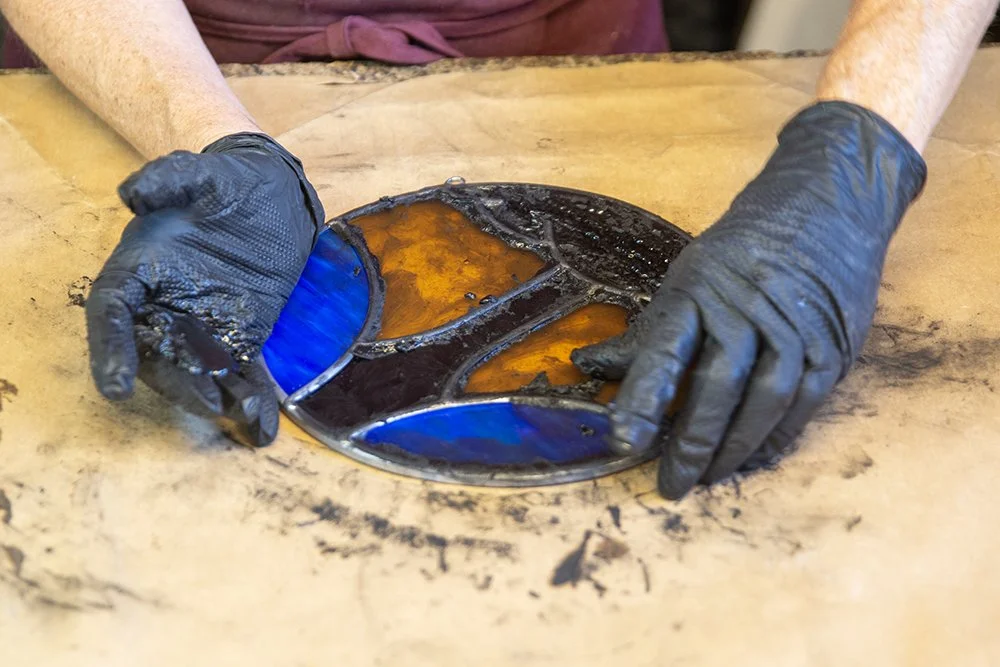
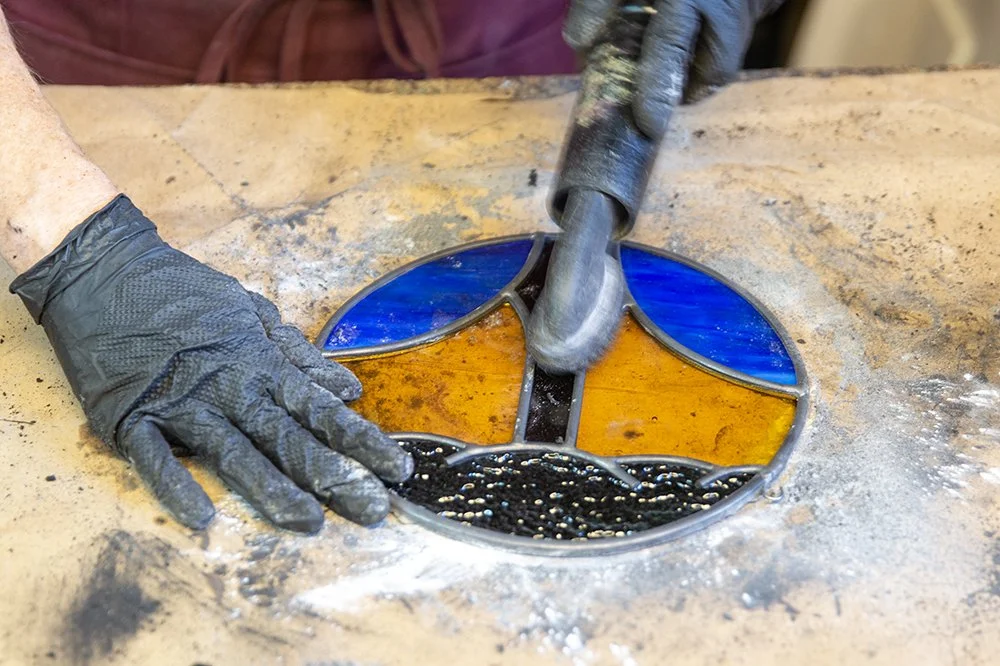
3. Use your thumb and/or fingers to push the putty up under the came. On larger pieces you can make the putty thinner and use a brush to push it up under the came to save time and your fingers.
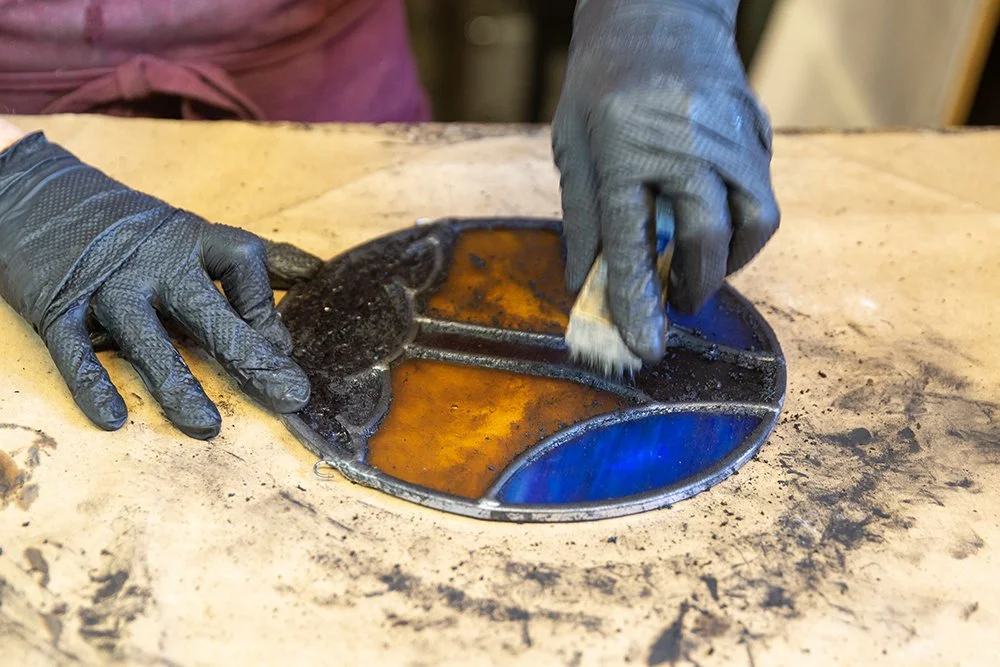
4. Use your putty brush to further push the putty under the came by pushing it towards the came—brushing side to side will start to pull it out from under the lead. This starts to remove the excess putty. We like to use one end of the brush; this just helps minimize clean up later.
5. Sprinkle with whiting and continue brushing.
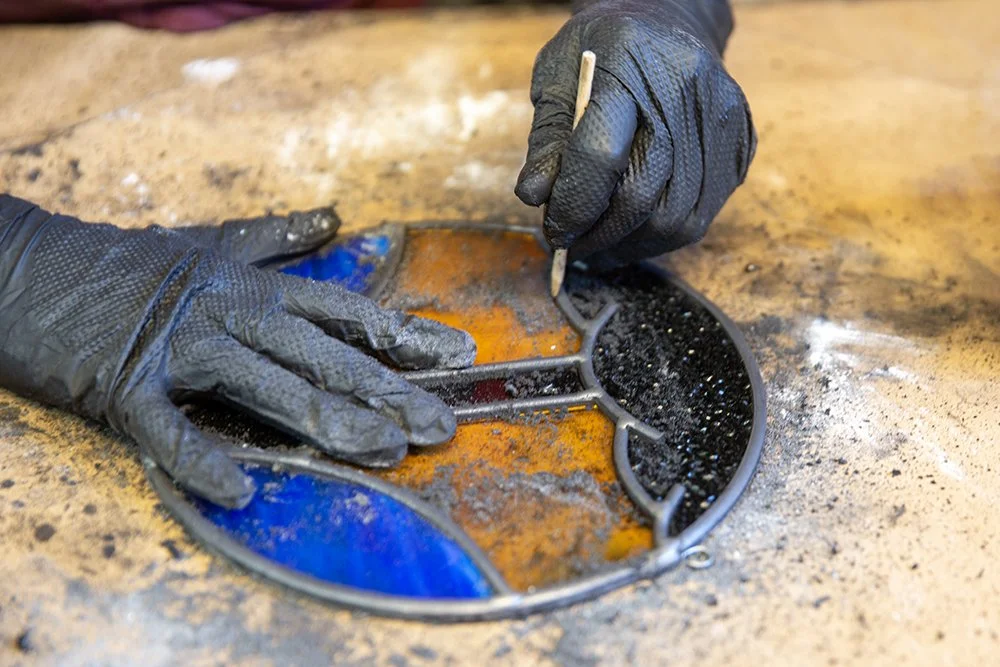
6. Use the orange stick to scrape the excess putty away from the came
7. Repeat step 5 and 6 until your piece starts getting cleaner. We like to vacuum up the excess putty as we work to help keep our work area as tidy as possible during this messy process.
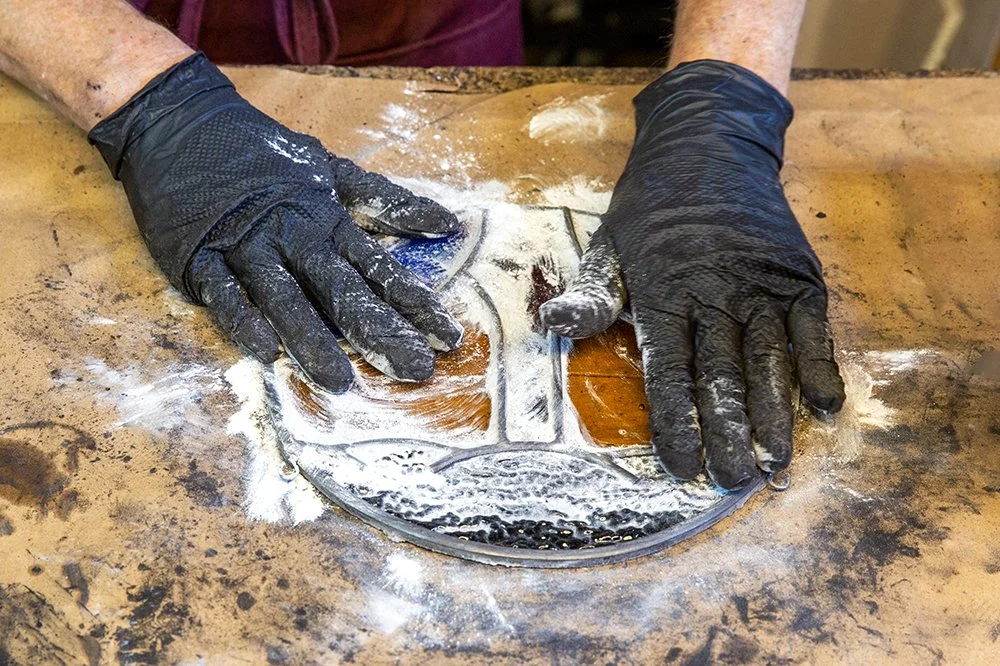
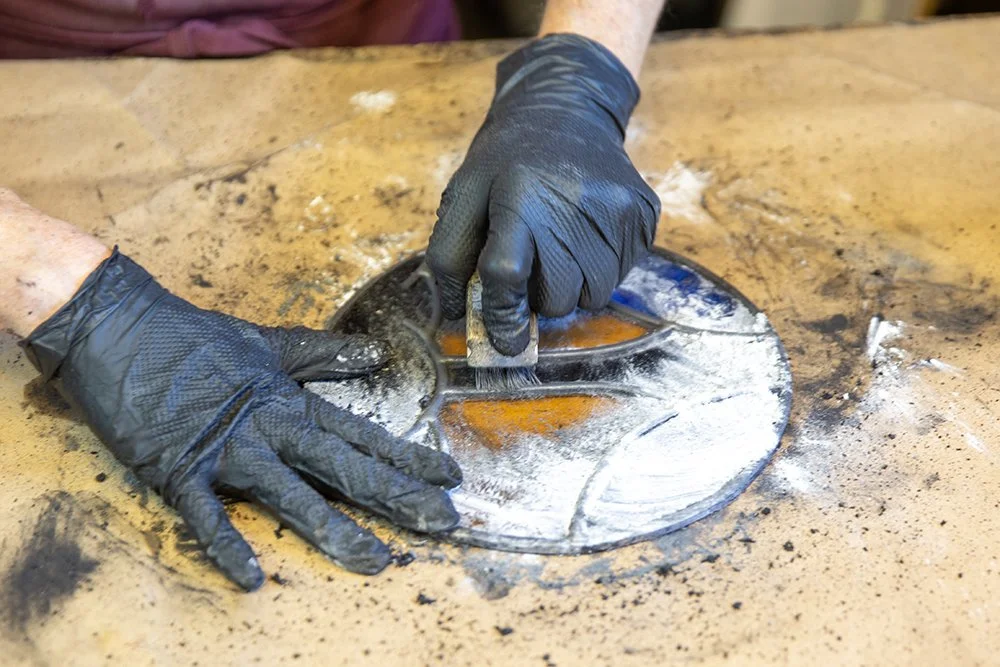
8. Once your piece is fairly clean of excess putty rub on some more whiting - pushing it into the putty up under the came.
9. Flip over and repeat on the back—for some smaller, free hanging pieces that don’t need to be waterproofed and don’t need the added strength we will sometimes save ourselves the time/work and only putty the front.

10. Let rest for a few days.
11. Throughly clean your putty container and mixing lid with turpentine/mineral spirits. This step is important! You want to make sure you get all the excess putty off the edges of the container so it can be re-used and no putty will be left to dry and potentially get in your fresh putty and later scratch your glass.
12. Throughly clean your putty brush. A lot will come off while working, but you can use turpentine or mineral spirits to clean any residue remaining. If any amount of putty dries on your brush and you can’t get it off, it’s best to just throw it away; it’s not worth potentially scratching up your lead and glass. Most lead brushes only last between 5-10 uses and are relatively cheap to buy.
final cleaning
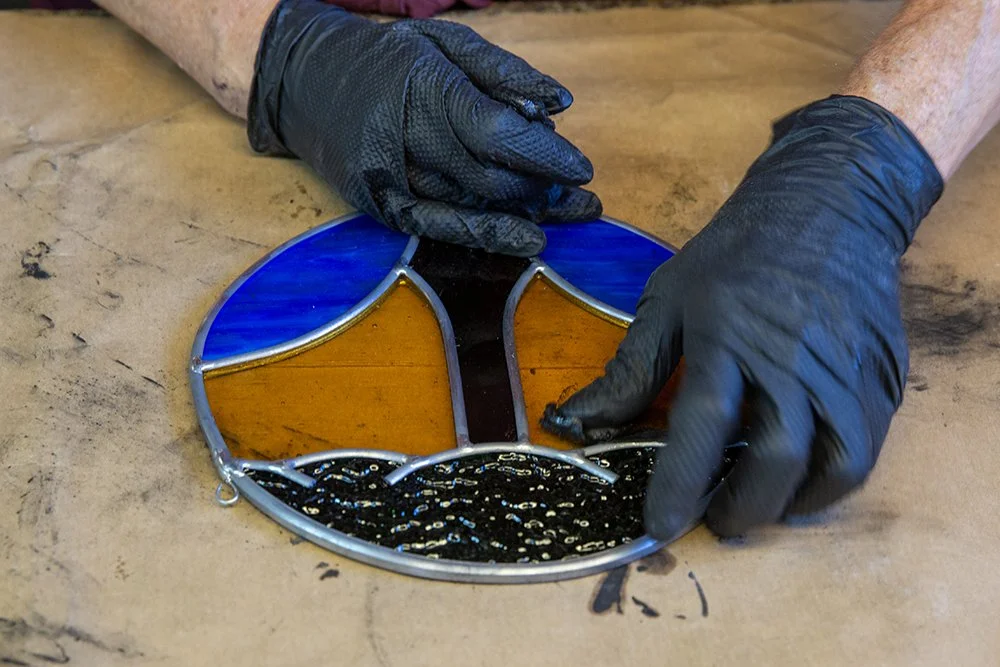
Gently scrub the piece with whiting and your lead brush to polish it up.
Use an orange stick (for extra stuck on or tight areas I will very very gently use an x-acto knife) to get any remaining putty off.
It’s not necessary, but if you want you can wax your piece.
Vic rothman’s putty recipe
3 parts 25 microns whiting
1 part 3 microns whiting
5% talc powder
49.5% boiled linseed oil*
49.5% raw linseed oil
1% tall oil
Black cement color to taste